Deploying the Fragment Graph
Note
Allow 2 hours to install all of the applications.
With the AWX server configured we can now run the Job Templates that are responsible for deploying the various applications.
Start by logging into the AWX application server as the demo user demo.
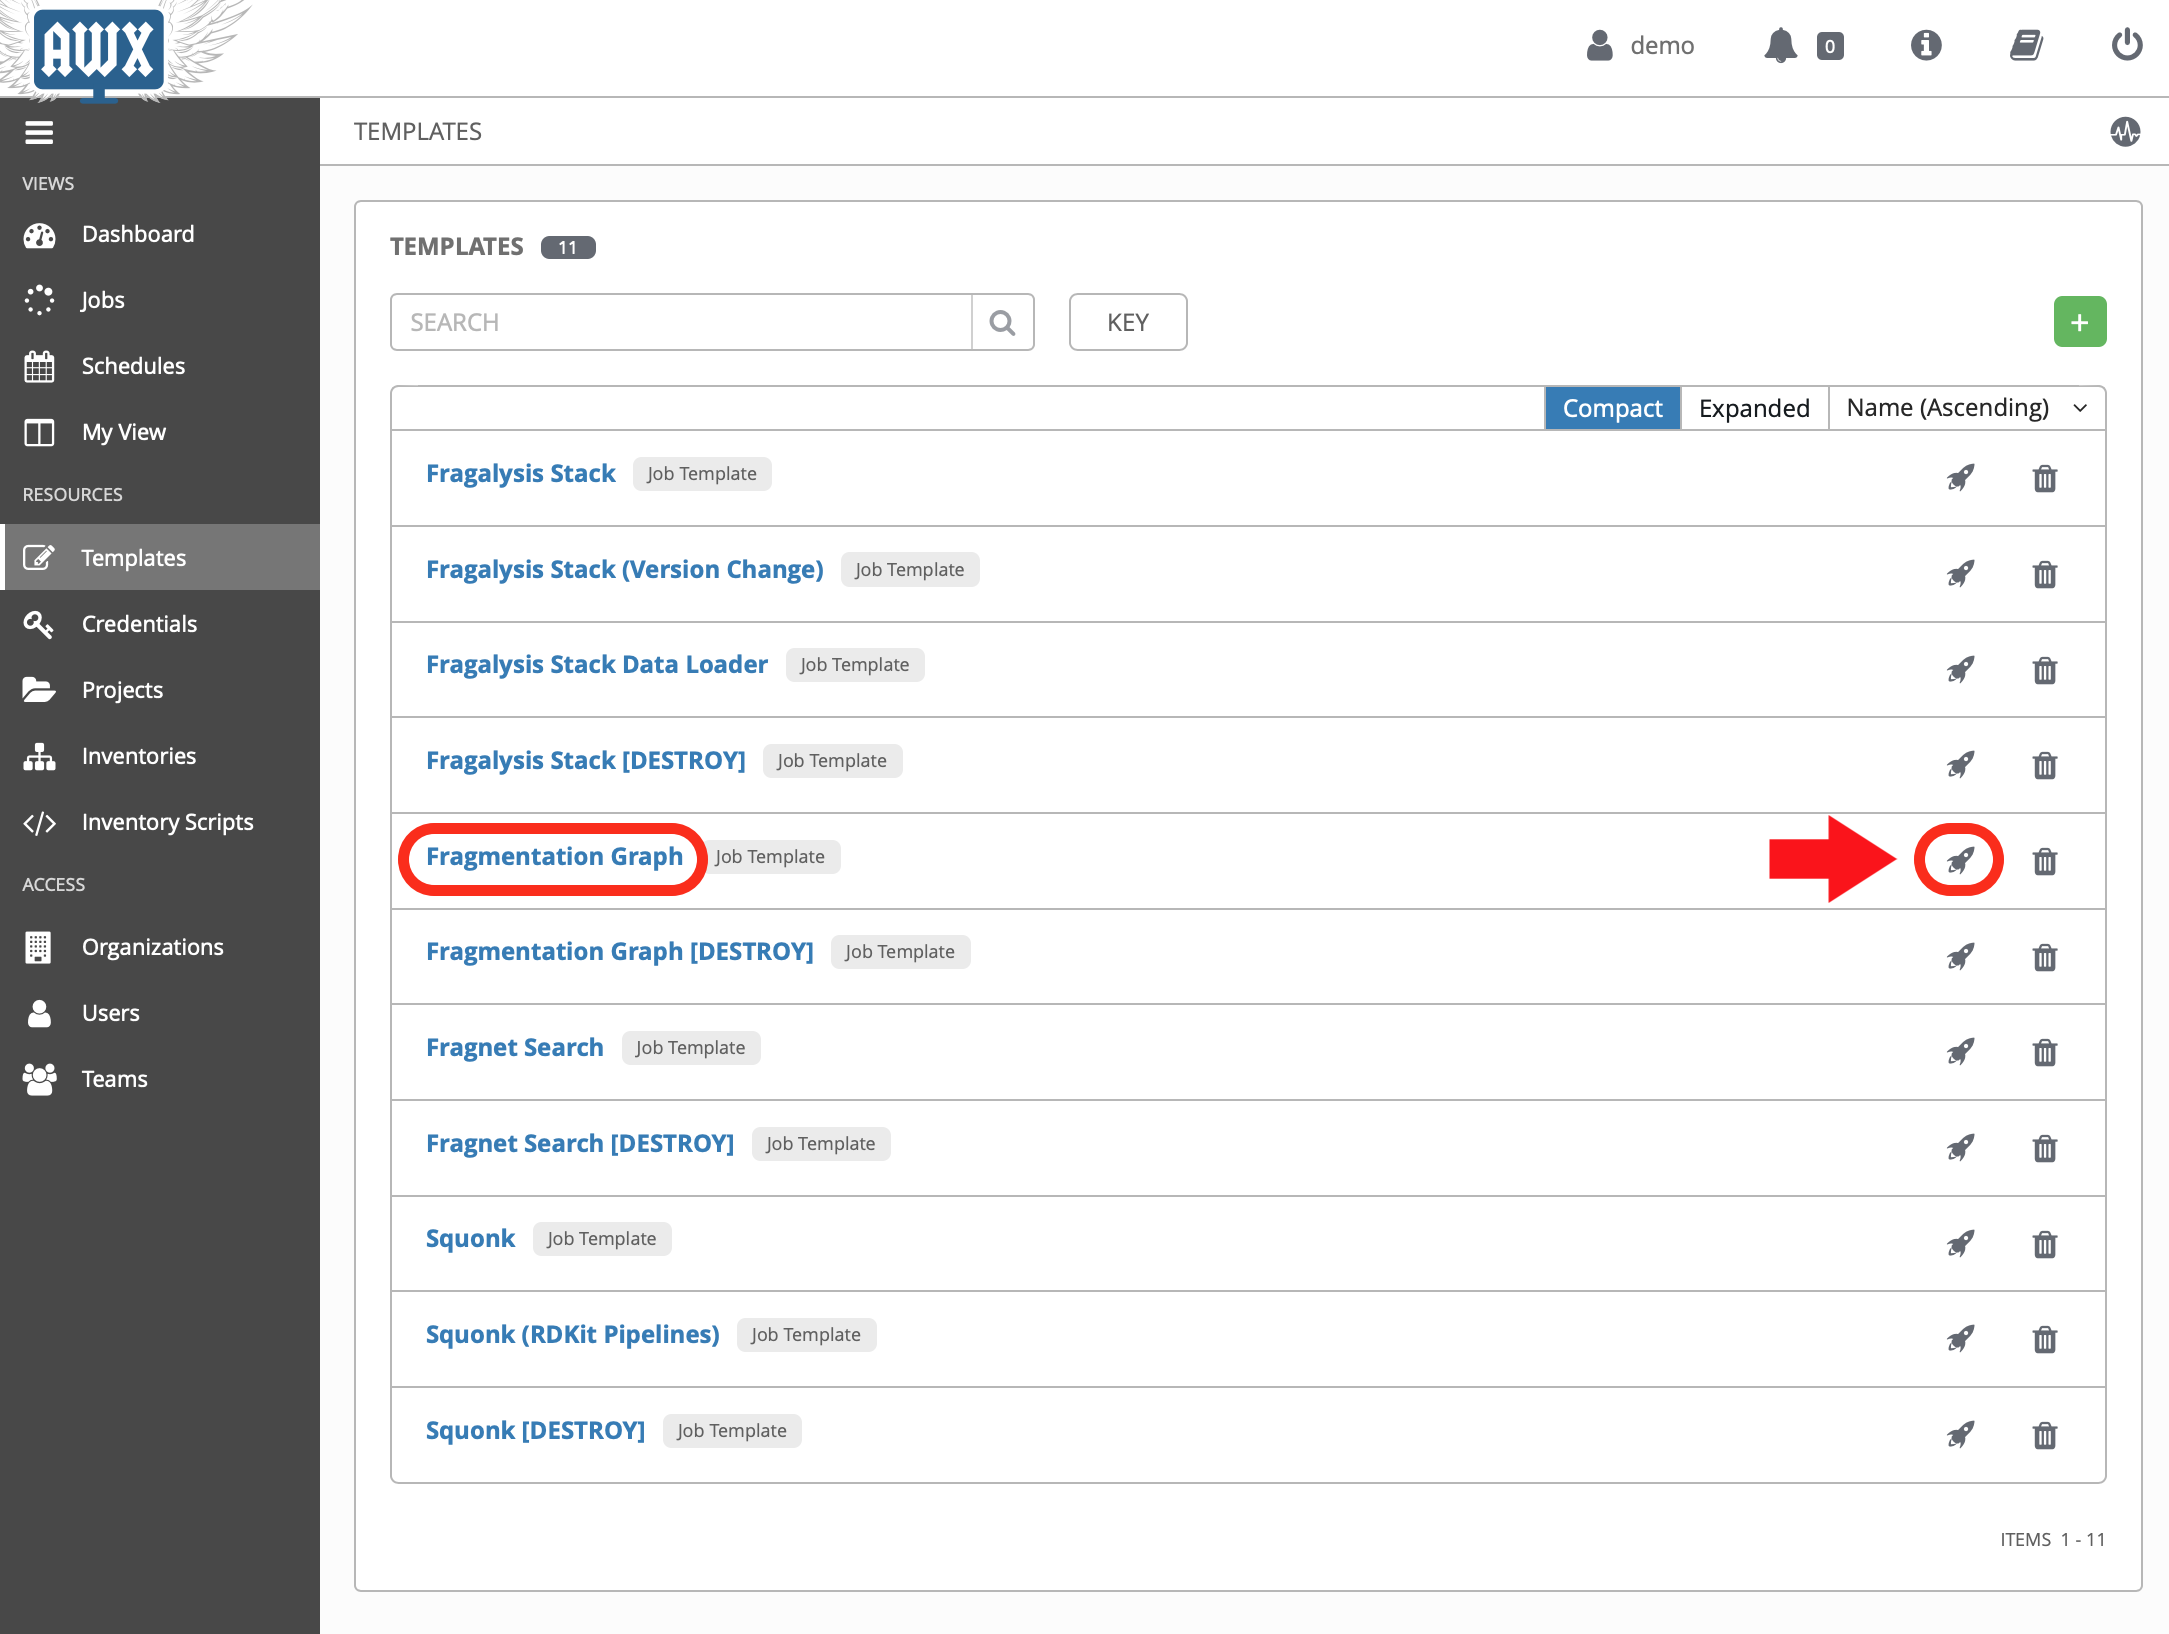
From there you should be able to navigate to the Templates screen where
all the templates are presented to you.
Note
Allow 2 hours to complete this task.
Deploy the Fragmentation graph by launching the Fragmentation Graph template.
The jobs have been configured to first present a confirmation dialogue box so that you can adjust some key job variables before they run. for example, the Fragmentation Graph job allows you to provide a path to the graph data you want to deploy (using thegraph_bucket_pathvariable).
Acknowledge the dialogue (clicking Next) and then the Launch button.
As the graph initialisation can take some time the job does not
(at the time of writing) wait for the graph to initialise. We therefore use the
kubectl command-line to check on the status of the graph before moving on.
Check that the graph namespace exists:
$ kubectl get namespace/graph
NAME    STATUS   AGE
graph   Active   7s
And then watch the Graph Pod status until it’s Running. The
graph contains an initialisation container used to download the graph
data to the cluster:
$ kubectl get pod/graph-0 -n graph -w
NAME      READY   STATUS     RESTARTS   AGE
graph-0   0/1     Init:0/1   0          14s
graph-0   0/1     Init:0/1   0          95s
graph-0   0/1     Init:0/1   0          100s
graph-0   0/1     PodInitializing   0          108s
graph-0   1/1     Running           0          114s
Once you see Running the Pod has started and you can ctrl-c from the
command.
The graph needs to import the downloaded files into a graph database, which can take a significant length of time, depending on the data that’s been downloaded.
You can follow the Graph Pod’s logs and wait for the import process to complete. The graph import typically involved 4 stages that are easily followed from the logs.
The output here has been truncated because there is a lot of it.
Importantly, to be confident the deployment has worked, you must see: -
- A section starting
(1/4) Node import - A section starting
(2/4) Relationship import - A section starting
(3/4) Relationship linking - A section starting
(4/4) Post processing
And, finally, you’re waiting to see the word Finished. issued by the
cypher-runner.sh script:
$ kubectl logs pod/graph-0 -n graph -f
[...]
(1/4) Node import 2020-09-16 03:18:22.955+0000
Estimated number of nodes: 40.16 M
Estimated disk space usage: 8.64 GB
Estimated required memory usage: 1.49 GB
.......... .......... .......... .......... ..........   5% ∆4s 813ms
.......... .......... .......... .......... ..........  10% ∆3s 609ms
.......... .......... .......... .......... ..........  15% ∆3s 405ms
.......... .......... .......... .......... ..........  20% ∆3s 406ms
[...]
(4/4) Post processing 2020-09-16 04:13:13.062+0000
Estimated required memory usage: 1020.01 MB
.--.-..... .......... .......... .......... ..........   5% ∆7s 601ms
.......... .......... .......... .......... ..........  10% ∆11s 413ms
.......... .......... .......... .......... ..........  15% ∆12s 209ms
.......... .......-.. .......... .......... ..........  20% ∆3s 906ms
[...]
2020-03-19 14:25:08.527+0000 INFO  ======== Neo4j 3.5.5 ========
2020-03-19 14:25:08.532+0000 INFO  Starting...
2020-03-19 14:25:14.865+0000 INFO  Bolt enabled on 0.0.0.0:7687.
2020-03-19 14:25:16.444+0000 INFO  Started.
2020-03-19 14:25:17.531+0000 INFO  Remote interface available at http://localhost:7474/
(cypher-runner.sh) Thu Mar 19 14:26:05 UTC 2020 Setting neo4j password...
(cypher-runner.sh) Thu Mar 19 14:26:07 UTC 2020 No legacy script.
(cypher-runner.sh) Thu Mar 19 14:26:07 UTC 2020 Trying /data/cypher-script/cypher-script.once...
(cypher-runner.sh) Thu Mar 19 14:26:08 UTC 2020 .once script executed.
(cypher-runner.sh) Thu Mar 19 14:26:08 UTC 2020 No .always script.
(cypher-runner.sh) Thu Mar 19 14:26:08 UTC 2020 Touching /data/data-loader/cypher-runner.executed...
(cypher-runner.sh) Thu Mar 19 14:26:08 UTC 2020 Finished.
Once you see that you can ctrl-c from the follow command and continue
with the remaining applications.